Administration
People-Employees/Candidates/Members
People linked to the organisation
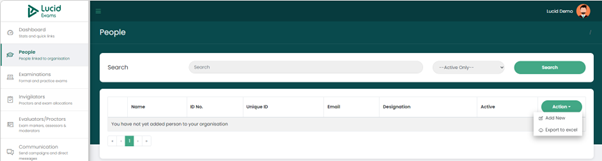
People linked within your organisation are added under the People’s module.
On the Action dropdown, you have an option to individually add people to your organisation and to export all records to excel when you need an excel file. All the people added to your organisation will be displayed on the main page shown below.
The Creation Of A Person Record
Capturing A New Individual Record into The System
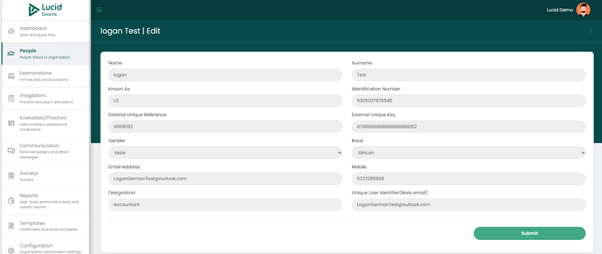
Click on the add new button, below page will open.
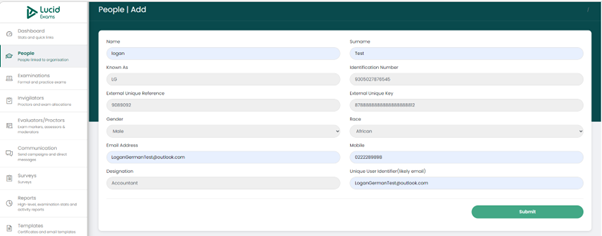
When adding individual details, you are required to capture the below details:
- Name: the first and middle name of the person
- Surname: the last name of the person.
- Known as: the nickname of the person.
- Identification number: the identification number of the person.
- External unique reference: the unique reference assigned to the person.
- External unique key: the unique key assigned to the person.
- Gender: the gender of the person, choosing from a dropdown list
- Race: the race of the person, choosing from a dropdown list
- Email address: the email address of the person
- Mobile: the mobile number of the person
- Designation: the designation the person is registered for.
- Unique user identifier (likely email): the user identifier details, likely an email address.
Once all the above details have been captured, click on the submit button. The record will be created and saved.
People Linked To The Organisation Display page
People's Records Display Main Page
The saved record is displayed on the PEOPLE’s Module main page.
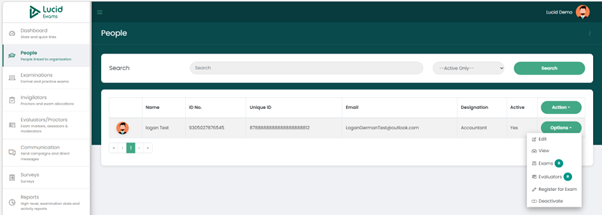
The data fields that are displayed on the main page consist of:
- Name: the name of the individual
- ID No.: the identification number of the individual
- Unique ID: the unique identification number of the individual
- Email: the email address of the individual
- Designation: the designation title of the qualification being done by the individual
- Active: an indication if the record is active or inactive.
Once a record is created, there is an “Options” dropdown colunm per individual record created. You can:
- Edit the person’s profile record.
- View the person’s profile details.
- View exams allocated to the person.
- View evaluators allocated to the person.
- Register the person for an exam.
- Activate or deactivate the person’s account.
You can filter your search results by searching for any individual record using either the name, ID number, Unique ID, or email address. You can also bulk filter using the designation title as the keyword.
Updating People's Profile Information
Editing Individual Profile Details
You can make changes to the individual’s profile by clicking on the “Edit” button on the Options dropdown list.
You can edit the following data fields:
- Name: the name of the person.
- Surname: the last name of the person.
- Known as: the nickname of the person.
- Identification number: the ID No. of the person
- External unique reference: the unique reference of the person
- External Unique key: the unique key of the person
- Gender: the gender of the person, selected from the dropdown list
- Race: the race of the person, selected from the dropdown list
- Email address: the email address of the person
- Mobile: the contact details of the person
- Designation: the field of study of the person
- Unique user identifier (likely email): the unique identifier of the person.
Once you have made all your changes, click on the “Submit” button to save the updated changes.
Viewing People's Profile Information
Viewing Individual Profile Details
You can view the individual’s profile in summary by clicking on the “View” button on the Options dropdown list.
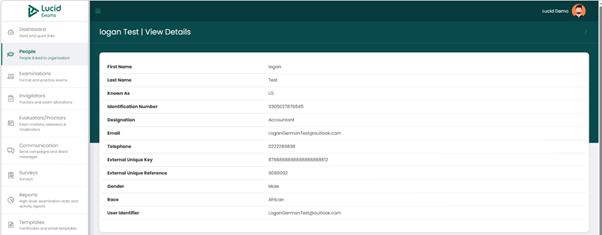
Details available on this page consist of:
- First name: the name of the person
- Last name: the surname of the person
- Known as: the nickname of the person.
- Identification number: the ID No. of the person
- Designation: the field of study of the person
- Email: the email address of the person
- Telephone: the contact details of the person
- External unique key: the unique key of the person
- External unique reference: the unique reference of the person
- Gender: the gender of the person
- Race: the race of the person
- User identifier: the email address of the person.
The Examinations That The Individual Registered For
Candidate's Examinations
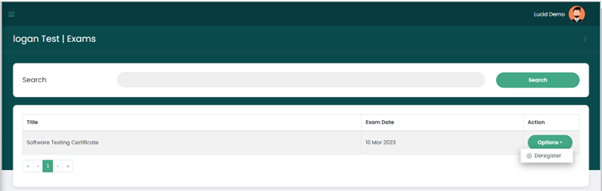
All exams that the candidate has registered for are displayed under the Candidate’s Exam tab, under the Action dropdown options for each individual.
The details displayed on Exam page are:
- Title: the examination title
- Exam date: the examination date of commencement
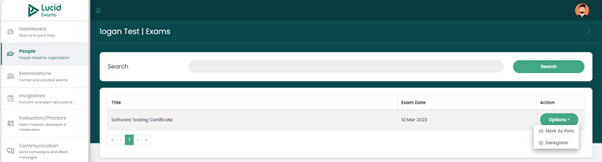
On the registered exam “Options” button, there are two options:
- Deregister: to deregister the candidate for the exam and
- Mark as paid: to make it as paid if payment has been received. MARK AS PAID option is only available to payable exams.
Registering An Individual For Examinations
Register and Deregister an Individual for An Examination
To register a candidate for the exam, click on the “Register for the exam” button, on the Individuals's Action dropdown options. All available exams that the candidate has not registered for will display. Click on the “Register for this exam” button to register the candidate. When successfully registered you will get a confirmation pop-up. The exam will display on the candidate’s profile under the EXAMS tab.
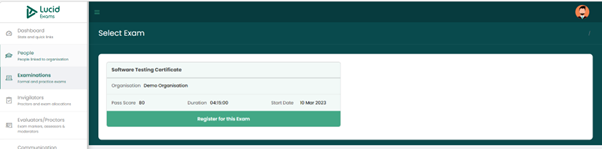
Candidate regisered Exam display page. You have the option to deregister the candiadte when necessary.
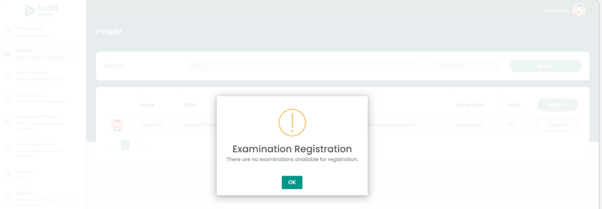
When no exam is available
If there are no exams to register the candidate for, you will get the below pop-up when attempting to register.
Assigning An Evaluator to a Candidate
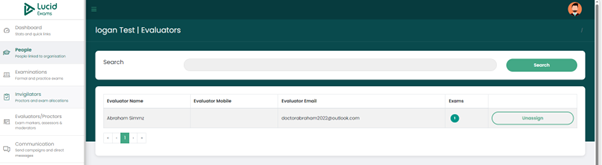
Assign and Unassign The Candidate's Evaluators
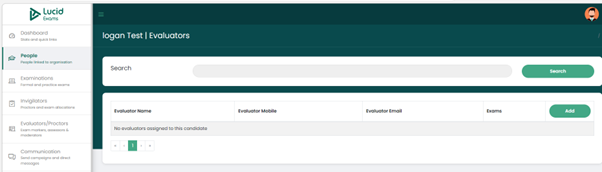
To assign an evaluator to the candidate, click on the “Evaluators” button in the dropdown options and you will land on the below page. All evaluators that have been assigned to the candidate will be displayed on this page. To assign an evaluator click on the “Add” button.
The data field columns available on this page are:
- Evaluator name: the name of the assigned evaluator
- Evaluator mobile: the contact details of the evaluator
- Evaluator email: the email address of the evaluator
- Exams: the examination the evaluator will be assessing for the candidate.
Add/Assign Evalutor
Select the evaluator you want to assign, then click on the submit button to complete the process.
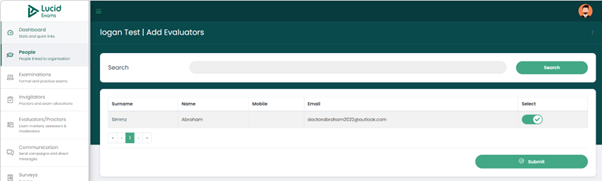
Details displayed on this page after assigning an evaluator consist of:
- Evaluator name: the name of the evaluator
- Evaluator mobile: the contact details of the evaluator
- Evaluator email: the email address of the evaluator
- Exams: the number of examinations assigned to the evaluator
- Unassign: you have the option to unassign the evaluator from the candidate.