Administration
Configuration - Organisation, Examinations Settings and Payment Setup
Organisation, Examination Settings, And Payment Configuration
Under the configuration module, there are four information tabs, namely:
- Organisation tab: where you can update the organisation details.
- Banks tab: where you can create and manage the banking details.
- Billing tab: where you can create and manage the online banking details.
- Customisation tab: where you can customise the system modules.
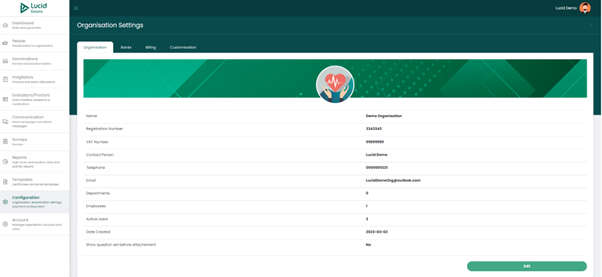
The Organisation Settings Configuration
Updating The Organisation Settings Details
You have the option to update the organisation details, by clicking on the “Edit’ button.
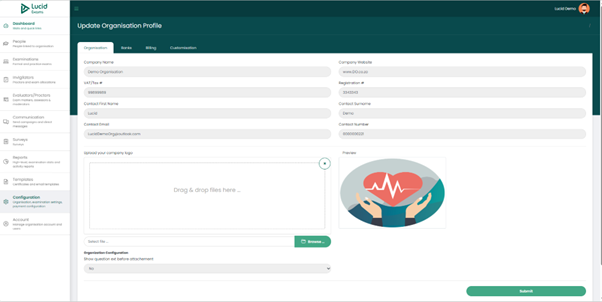
Edit Organisation Settings
The data fields that can be updated are:
- Company name: the name of the company
- Company website: the website of the company
- VAT #: the Value-Added Tax number.
- Registration #: the organisation’s registration number.
- Contact first name: the name of the person to contact.
- Contact surname: the last name of the person to contact.
- Contact emails: the organisation’s email address.
- Contact number: the organisation’s contact details.
- Company logo: an option to upload the company logo.
Once you have made your changes, click on the “Submit” button to save the changes.
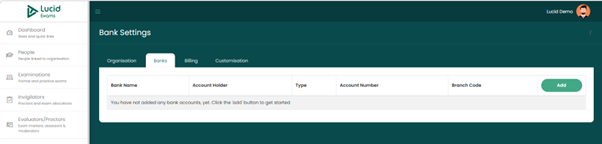
The Bank Settings Configuration
Capturing The Banking Details into The System
You have the option to add the organisation’s bank details by capturing them in the system. To add the banking details, click on the “Add” button and start capturing the necessary details.
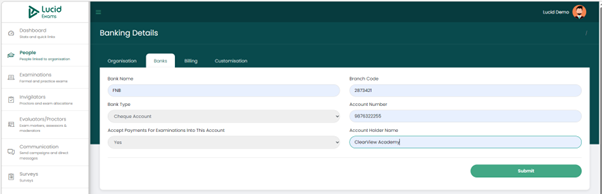
Add banking details
Details required when adding banking details are:
- Bank name: the name of the bank
- Branch code: the branch code of the bank
- Bank account type: the bank account type (cheque or savings account).
- Account number: the bank account number
- Accept payments for examinations into this account: an indication that the exam payment fees will be accepted into this account or a different account, select “yes’ or “no”.
- Account holder name: the name of the bank account holder.
Once all details have been captured, click on the “Submit” button to save the details.
The Bank Settings Display Page
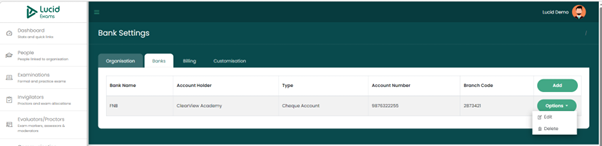
The Bank Settings, Details Display Main Page
Submitted banking details are displayed on the main page. The data field columns that are on the bank settings main page are
- Bank name: the name of the bank
- Account holder: the name of the account holder
- Type: the bank account type.
- Account number: the bank account number
- Branch code: the bank branch code
- Options: there is a dropdown with two options:
- Edit: the option to update the bank details
- Delete: the option to remove the bank details record entry from the system.
Updating The Banking Details
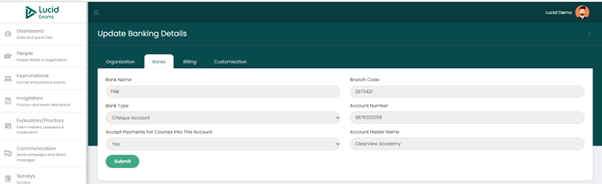
Editing Of The Banking Details
When editing the bank details, you can update the following data fields:
- Bank name: the name of the bank
- Branch code: the branch code of the bank
- Bank account type: the bank account type (cheque or savings account).
- Account number: the bank account number
- Accept payments for examinations into this account: an indication that the exam payment fees will be accepted into this account or a different account. Select “yes’ or “no”.
- Account holder name: the name of the bank account holder.
Once you have made your changes, click on the “Submit” button to save.
The Billing Settings Configuration
Capturing The Billing Details Into The System
You have the option of entering the organisation’s billing information into the system. To add the billing details, click on the “Add New” button and start capturing the necessary details.
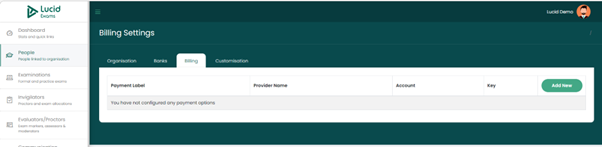
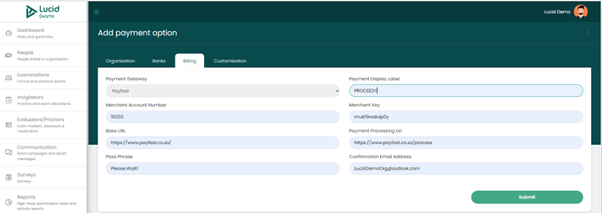
Create/Add Payment Option
Details required when adding billing details are:
- Payment gateway: there are two payment gateways to choose from:
- Pay Fast
- Pay Gate.
- Payment display label: add label content that will display on the payment page.
- Merchant account number: the merchant account number used by the payment gateway.
- Merchant key: the merchant key used by the payment gateway.
- Base URL: the base URL of the payment gateway.
- Payment processing URL: the payment processing URL of the payment gateway used.
- Pass Phrase: the passphrase used for the payment gateway.
- Confirmation email address: confirm the email address to be used for receiving payment notifications.
Once all details have been captured, click on the “Submit” button to save the details.
The Billing Settings Display Page
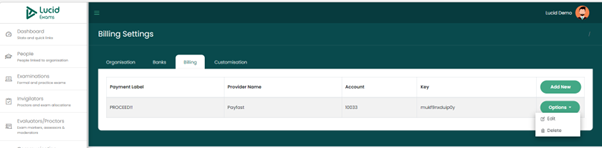
The Payment Settings, Details Display Main Page
Submitted billing details are displayed on the main page. The data field columns that are on the billing settings main page are
- Payment label: the payment label display
- Provider name: the name of the provider
- Account: the organisation’s billing account number
- Key: the merchant key
- Options: there is a dropdown with two options:
- Edit: the option to update the billing details
- Delete: the option to remove the billing details record entry from the system.
Updating The Billing Details
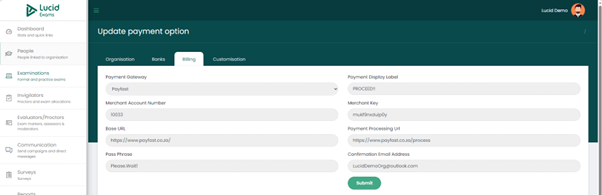
Editing Of The Payment Details
When editing the bank details, you can update the following data fields:
- Payment gateway: there are two payment gateways to choose from:
- Pay Fast
- Pay Gate.
- Payment display label: add label content that will display on the payment page.
- Merchant account number: the merchant account number used by the payment gateway.
- Merchant key: the merchant key used by the payment gateway.
- Base URL: the base URL of the payment gateway
- Payment processing URL: the payment processing URL of the payment gateway used.
- Pass Phrase: the passphrase used for the payment gateway.
- Confirmation email address: confirm the email address to be used for receiving payment notifications.
Once you have made your changes, click on the “Submit” button to save.
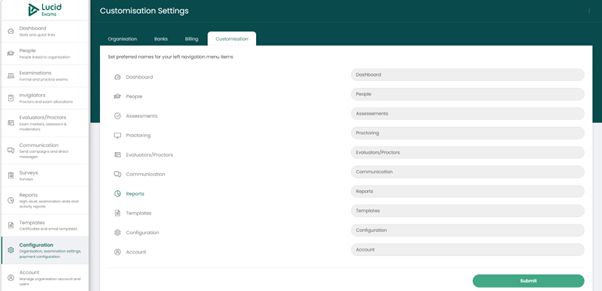
The Customisation Settings Configuration
The Customisation Of The System Sections/Modules
The customisation settings tab enables you to set a preferred name for your platform navigation menu items. After making changes, click on the “Submit” button. The navigation menu will update.