Exam Takers
My Exams- Registered and Practice Examination Tests
Examinations The Candidate Registered for And The Practice Tests
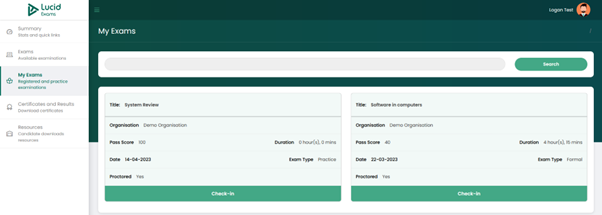
All the examinations that you have been registered for will appear under this module, the “My Exams” section.
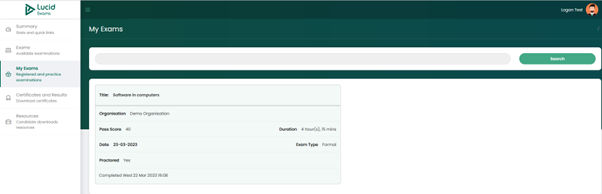
On the “My Exams” main page, displayed are the following examination details:
- Title: the examination title
- Organisation: the organisation providing the examination
- Pass Score: the maximum percentage or the number of questions you are required to obtain in order to pass the examination.
- Duration: the duration of the examination in hours and minutes
- Date: the date the examination will commence.
- Exam type: the examination type. There are two types of examinations:
- Practice: the practice exam is only for practice and does not count toward your final mark. The practice exam can be taken anytime, as long as it is available on your portal.
- Formal: the formal exam is not a practice exam, and it contributes to your final mark. You can only take the formal exam on the date it commences.
- Proctored: an indication if the exam is proctored or not. If the exam is proctored, it means there will be invigilators monitoring the entire exam as you write.
- Check-in: you need to check in to get verified before starting the examination
You have the ability to filter your search page by typing in the title of your examination or exam type in the search box to retrieve results for only the examination you filtered for.
Checking into The Exam
The Examination Check-in process
To start the examination, you have to click on the “check-in” button displayed under the “My Exams” main page to begin the authentication and authorisation process before starting the examination.
There are steps that have to be followed when checking-in.
Checking into The Exam: Step 1
Beginning Of The Check-in process
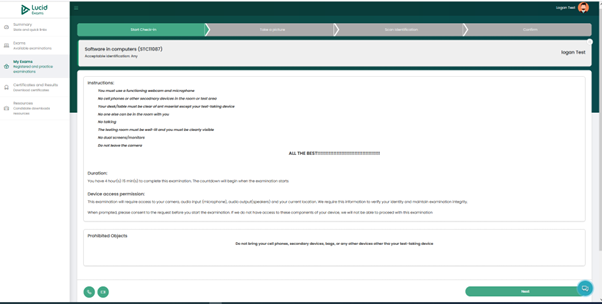
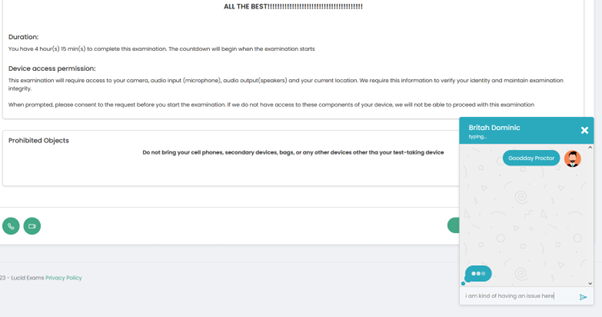
After clicking on the “check-in” button, you will land on the below page. On this page, you will see the following details:
- Start check-in: the page tab header
- Title: the examination title and the acceptable identification required for the exam
- Candidate name: the name of the candidate who is logged in (the account holder)
- Instructions: the examination instructions
- Duration: the examination duration, outlining when the countdown will begin. The countdown begins when the examination starts.
- Device access permissions: if the examination is proctored, the device permissions required will be specified in this section. When prompted, you have to consent (accept or enable) to the requests before starting the examination. If you do not consent, you will not be able to proceed with the examination.
- Prohibited objects: items that are not allowed in the examination area will be outlined. If you fail to adhere to that, you might not be allowed to write the examination.
If the examination is proctored, you will see the 3 icons at the bottom of the screen (page).
- Phone icon: it is for communicating with the proctor through voice calling.
- Video icon: it is for communicating with the proctor through a video call.
- Message icon: it is for communicating with the proctor through sending text messages.
After you have read and understood everything on this page, click on the “NEXT” navigation button to get to the next step.
Checking into The Exam: Step 2
Taking Your Face Pictures
As soon as you click on the “Next” button, you get the pop-up , which requires you to allow the application to use your camera. Click on “Allow” to grant the application permission to use your camera.
NOTE: if you block, you cannot proceed with the check-in process, as you will not be able to take the picture and you will not be able to write the examination.
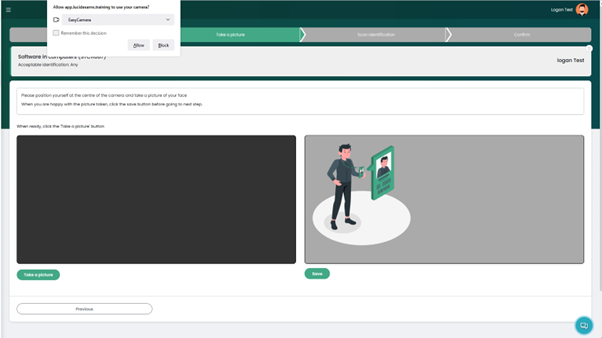
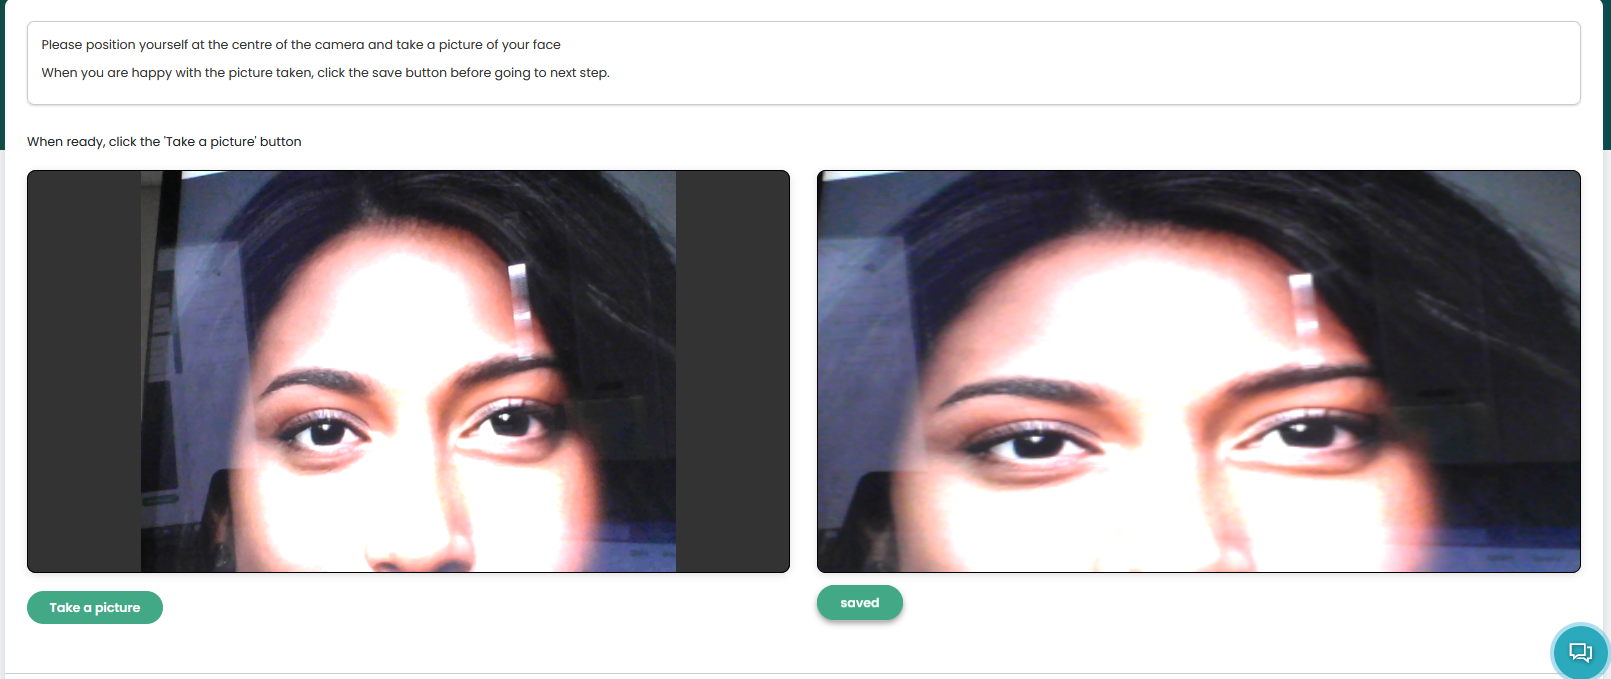
After granting permission, you can take the picture. Position yourself at the center of the camera and take a picture of your face. When you are happy with the picture taken, click the save button before going to the next step.
Checking into The Exam: Step 3
Scanning Your Identification Document
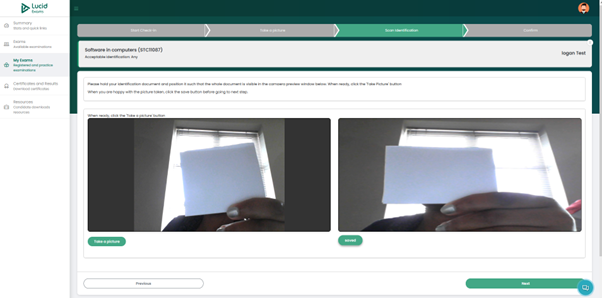
You have to take a picture of your identification card. Hold your identification document and position it so that the whole document is visible in the camera preview window below. When ready, click on the “take a picture” button. When you are happy with the picture taken, click on the save button before going to the next step, the last confirmation step.
Checking into the Exam: Last Step
Checking in Completed Confirmation Page
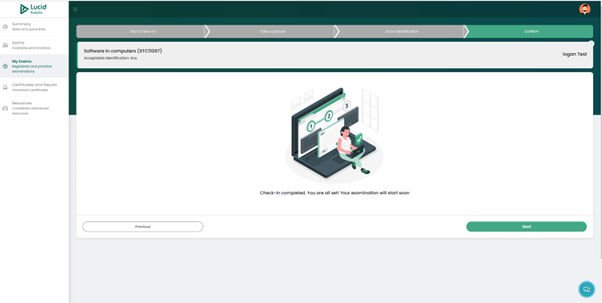
Once “check-in” is completed, you will get a confirmation on the “confirm” page. By clicking “start” you will commence your examination when the examination start time begins.
You can navigate to the previous steps, using the “previous” navigation button.
Begin The Examination
Starting The Examination
An exam can be configured to provide the score as soon as you complete the example, especially multiple choice question exams, whereas free text answer type exam questions would require an assessor to mark the exam scripts then release the results to the candidates, candidates will not get results instantly.
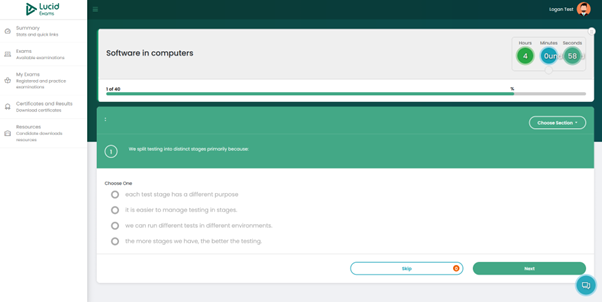
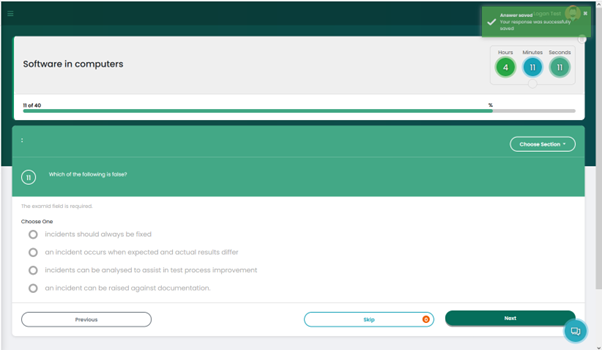
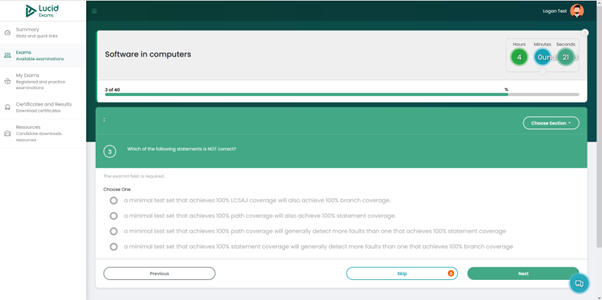
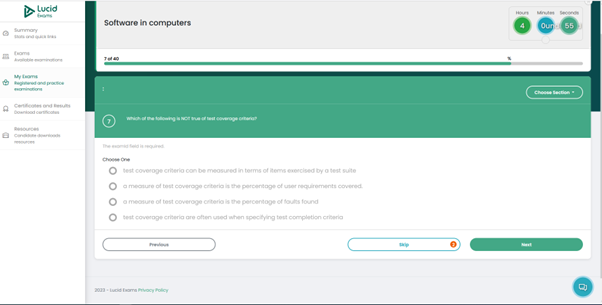
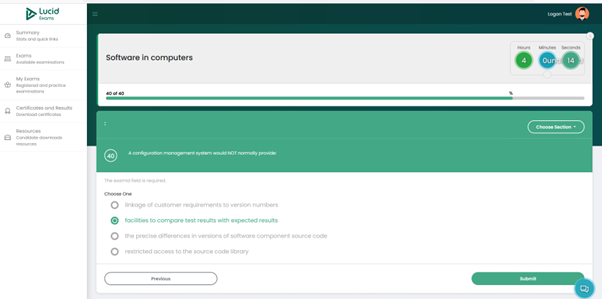
As you start the exam, after clicking on the “start” button, displayed on the first page is:
- Title: The title of the examination
- Duration: The examination duration which starts counting as you hit the start button, displaying in hours, minutes and seconds
- Numbering: The number of exam questions,
- Numbering: The question number you are on
- Choose section: The option to choose sections if you want to skip the current section and begin with a different section
- Skip: The option to skip a question. NOTE: as you skip questions, a record of skipped questions is kept so that you will be able to revisits the skipped questions to complete the exam. As you skip a question, you will see the number of skipped questions will keep increasing on the “SKIP tab”
- Next: The option to navigate to the next question. As you choose the answers and click the “Next” button, you will get a confirmation pop-up that your answer response was successfully saved.
- Chat icon: you have the ability to chat with your proctor as you write the exam if the exam is being proctored.
Text messaging
The chat box, where the candidate and the proctor can communicate via text messages
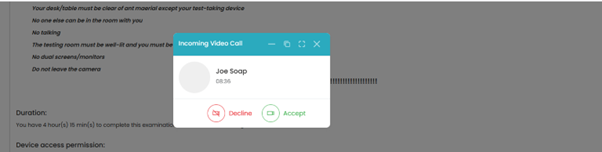
Video calling
Only the proctor can make a video call to the candidate.
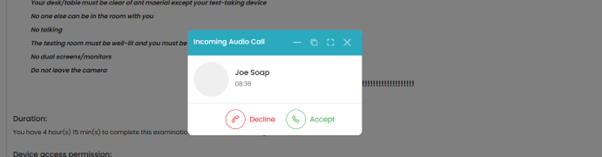
Audio calling
Only the proctor can make an audio call to the candidate
Saving Examination Question Answers
The Exam Question Answer Saving Functionality
As you choose the answers and click the “Next” button, you will get a confirmation pop-up that your answer response was successfully saved.
Previous navigation
If you wish to go back to the previous question, use the “Previous” navigation button to go back.
Skip question
As you skip questions, a record of skipped questions is kept so that you will be able to revisits the skipped questions to complete the exam. As you skip a question, you will see the number of skipped questions will keep increasing on the “SKIP tab”
Submitting The Examination
Submitting The Exam Script After Completing All The Examination Questions
If you have skipped questions and have not completed the questions, you cannot be able to submit the examination, instead you will get the below pop-up alert.
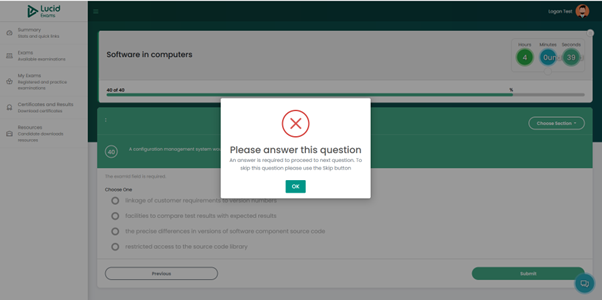
after completing the skipped questions, you will be able to submit.
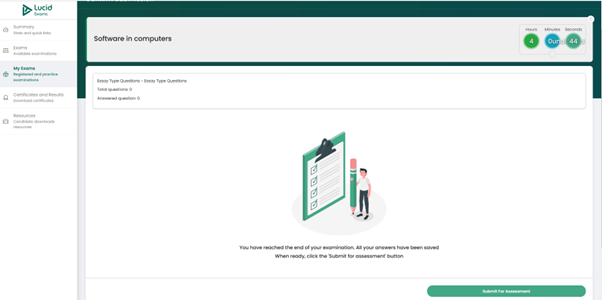
Examination Submission Confirmation
The Confirmation Of Your Examination Script Submission
After clicking on the submit button. You will get the below page, confirm if everything is in order. Once you done, click on the “Submit for Assessment” button to make the final submission .
Data display on this page consist of:
- Title: the name of the examination carried out
- The section types that were par of the examination
- Total question: the total number of questions in the examination
- Answered questions: the total number of questions you answered
Submit for Assessment
Once you have submitted, you will get the below image. Your examination will be saved; hence you can log out. Once the Assessor is done assessing your examination script, your results will be released.

When you navigate back to the “My exams” module, the exam you completed will display that it was completed.